Setting-up a Server
Strix Cloud allows you to implement online game servers only by setting-up. This page presents you a walkthrough to make the server-side set-up.
Creating an account and signing in
If this is your first time to use Strix Cloud, you need to create an account before proceeding. The steps to create your account is explained here.
If you already have your account, please sign in on the top page of Strix Cloud’s Web Console (https://www.strixcloud.net).
Creating an application
After signing in, you see Application List Page.
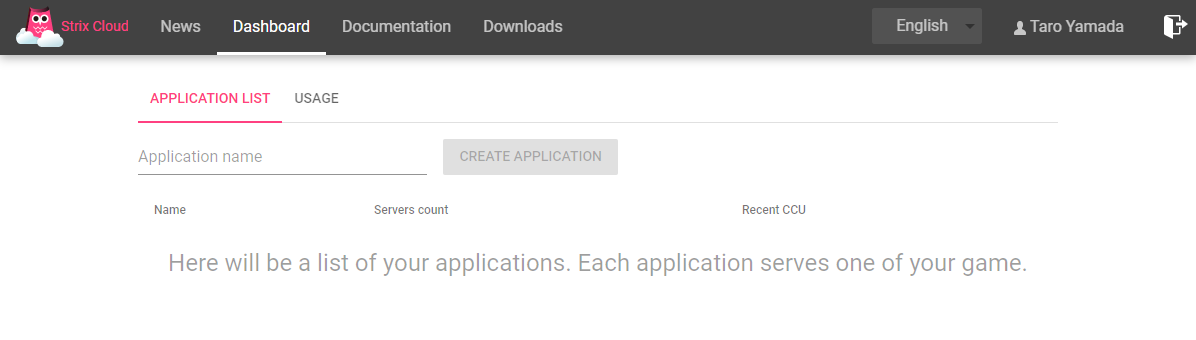
Let’s create an application on this page. (The term “application” means a unit of administration in Strix Cloud, corresponding to a game title.) See “Application” for details.
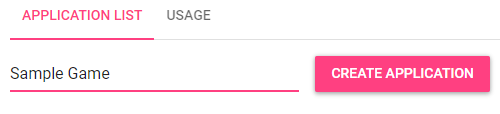
This page shows a list of applications you have created so far, but the list is empty for now, because you have no applications yet. Enter any name you want on the Application Name field, then click on the Create Application button. We call it “Sample Game” in this walkthrough.
When you create an application, the list shows the name of your application.
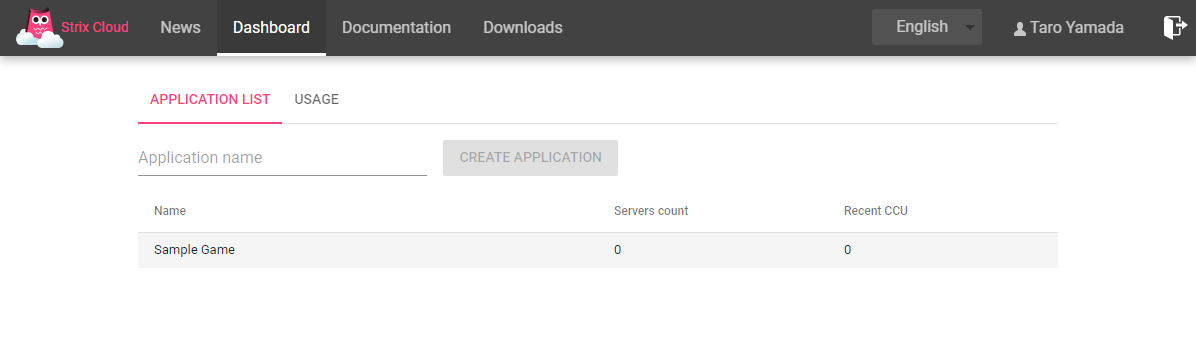
Clicking on the name leads you to the Application Dashboard for your “Sample Game” application.
Creating a cluster
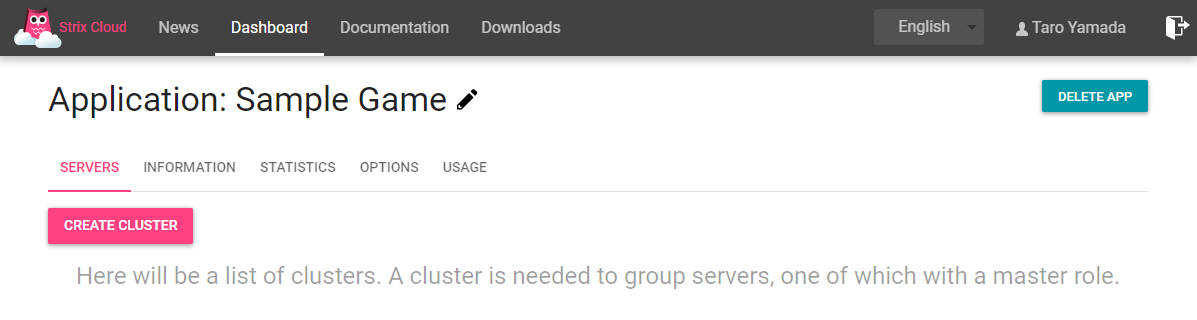
At this moment, we have defined an application but no server in it. Let’s create a cluster to add a server to. (A cluster is a group of servers in Strix Cloud for server management.) See “Application” for details.
Now, click on the Create Cluster button to show the Create cluster popup.
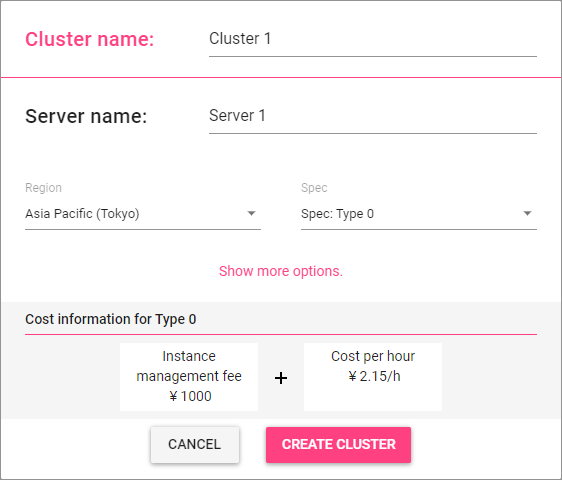
On the very top of the popup, you specify the name of the cluster you are creating. You can give it whatever name you want, but we accept the default name “Cluster 1” for the purpose of this walkthrough.
Creating a cluster will automatically add a server instance, and the settings below Server Name are for that first server.
Server Name |
Specify any name of the server. For the purpose of this walkthrough, we accept the default name “Server 1”. |
Region |
Region designates an area of the data center that the server runs on. Several options are available, and you choose a region you want. It is recommended to choose the closest region to your area of residence. |
Spec |
A spec of a server instance is an indication of its power (processing performance and/or size) provided by Strix Cloud. Type 0 is the smallest, and larger numbers are more powerful. Let’s pick up Type 0 for now. |
You can click on Show More Options button to see detailed options, but you should initially keep those detailed options as their defaults (so, for the moment, you don’t need to show more options.)
If you click on the Create Cluster button after specifying Cluster Name, Server Name, Region, and Spec, a cluster is created, a server instance is added to it, and the cluster is started automatically.
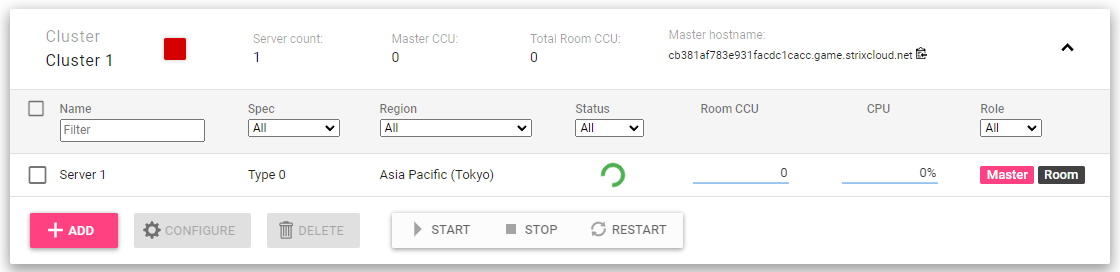
After creating a cluster, the created cluster (Cluster 1) and the server instance added to it (Server 1) are shown on the Dashboard. Look at the Status on the line for Server 1. The status indicator shows a spinning circle as shown above soon after the creation, meaning the server is not ready yet. Later, the color of the circle changes several times, then it turns to a yellow square, then to a green square. The green square is an indication that the server instance is running.
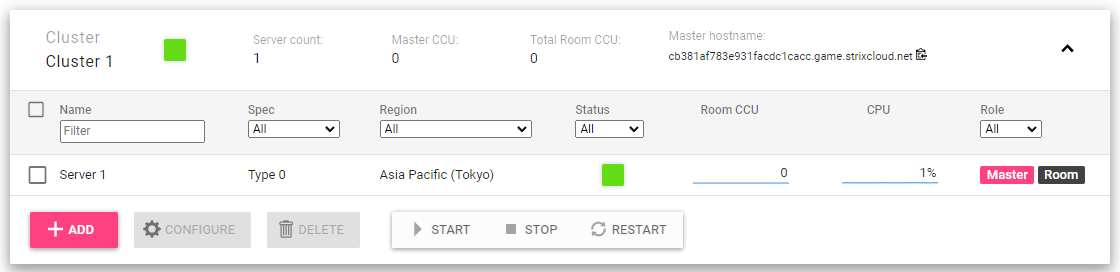
Now your STRIX game server is ready!
Stopping and starting a server
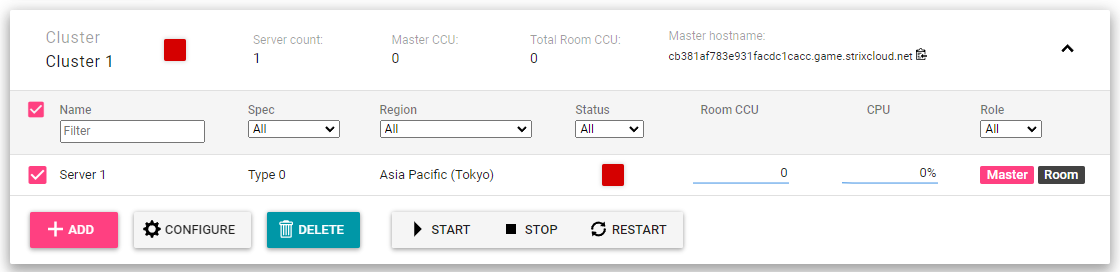
You can stop one or more servers when if you don’t use them, e.g., when your game is still under development.
You can stop a server without losing its configuration by checking the checkbox to the left of “Server 1” and clicking on Stop button. When the server is stopped, the Status turns to red. Checking the checkbox for a stopped server and clicking on Start button starts the server, and its Status turns back to green.
Note
Stopped server instances are not subject of the fees based on their usages. (Note, however, that stopped server instances are subject to the monthly instance management fees.)