Quickstart
This page gives you a quick walk-through to create online games with Strix, talking briefly about the major features of Strix and how to use those features in your game.
Preparation
To begin, follow the steps described in “Strix Cloud Setup”, so that you have your Strix server running on the cloud.
Start your Unreal Editor and create a new project using Third Person template (With Starter Content.) This is for the purpose of this walk-through only; you can, of course, use Strix in any type of game you want.
After creating the project for this walk-through, terminate Unreal Editor and follow the steps in “Installing SDK” to install Strix Unreal SDK plugin into the Unreal project.
Note
This walk-through is written using Unreal Engine 4.21. Since Unreal Engine evolves from time to time, your Unreal Editor may show a different UI if you are using a different version of Unreal Engine. It will be safer to use 4.21 when you follow this walk through.
Initial Setup
With a new project, we will first create a GameInstance class to perform our initial connection.
Open your Unreal project.
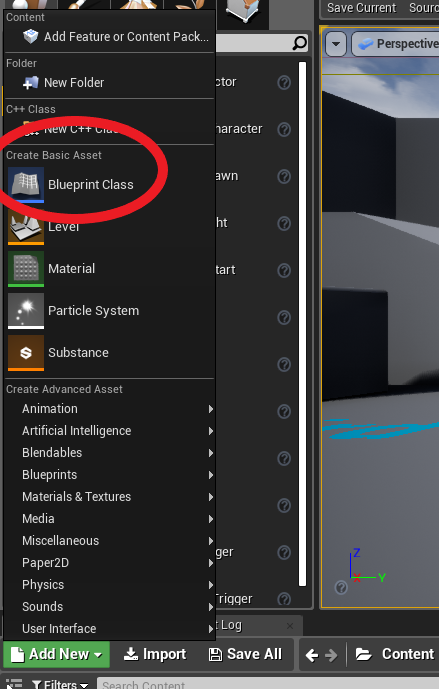
In the Content Browser, go to the Add New menu, and select Blueprint Class underneath Create Basic Asset.
We will extend the GameInstance class, so in the Pick Parent Class Window, search for GameInstance, and select it.

This will create a new GameInstance in your content browser. Name it something descriptive, such as StrixGameInstance.
In your Settings > Game Specific Settings > Project Settings, search for GameInstance under Maps & Modes. Once searched, you will see a drop-down box with the current GameInstance specified. Set the GameInstance to your new StrixGameInstance. Doing so tells Unreal to use StrixGameInstance as our GameInstance class. In more complex games, it is recommended that you implement the connection logic using GUI widgets for things like implementing server browsers. However, for this example, we are using the GameInstance here since this logic will be done at the startup of our game and since the Strix Blueprint functions can be called from anywhere you’d like.
Back in the Content Browser, double-click your new game instance to open it as a Blueprint and add the following variables. If you don’t know your Master Hostname or Application ID, see Strix Cloud Setup for their locations:
Master Hostname
String
This is the hostname of your Master Server. This is available on your Strix Cloud page.
Master Port
int
This is the port number for your Master Server. It is 9122 when using Strix Cloud.
Application Id
String
A unique application ID for your application. This is available on your Strix Cloud page.
Member Properties
Strix Property Map
This is one of Strix’s struct types. This will represent your client properties.
Room Properties
Strix Property Map
This represents the room’s properties.
Now with our variables added, let’s set these variables and do some initial setup. In our StrixGameInstance Blueprint, we will first add an Event Shutdown event node, and attach the Stop Strix Network node to its output. Next, on Event Init, set your Master Hostname, Master Port and Application Id variables if you have not done so already.

With this finished, we need to set some information for Strix to use. Begin by creating Set nodes for both the Member Properties and the Room Properties. Next, use the Make Strix Property Map function to create a new property map for each property. Feed the output of these separately into the Set String Property and Set Int Property functions as shown below. In order for these properties to function properly, you will need a String called “name” for the member properties (this is the name of your player), an Int called “capacity” and a String called “name” for your room properties.
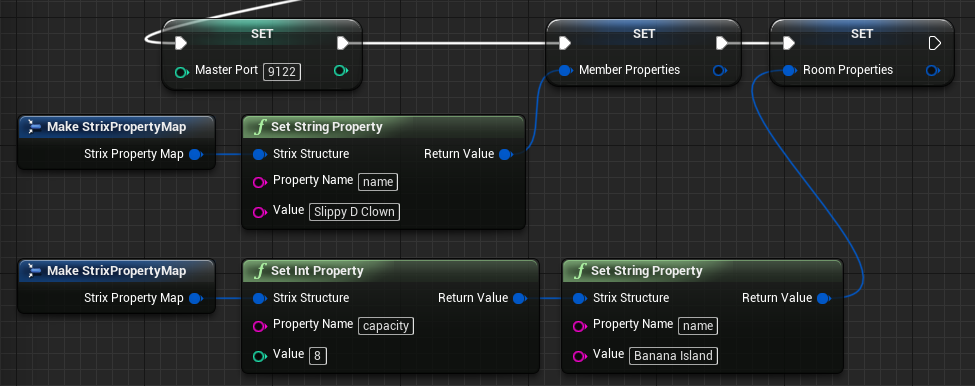
Note
To prevent hard-to-find bugs, property names are case sensitive. In most cases, the display name of the property is NOT the one that needs to be used. The same applies to types - if you try to set an integer for a String property - your request will fail on the server-side.
Connecting to the Server
Now that we have set up our variables, it’s time to start connecting to Strix.
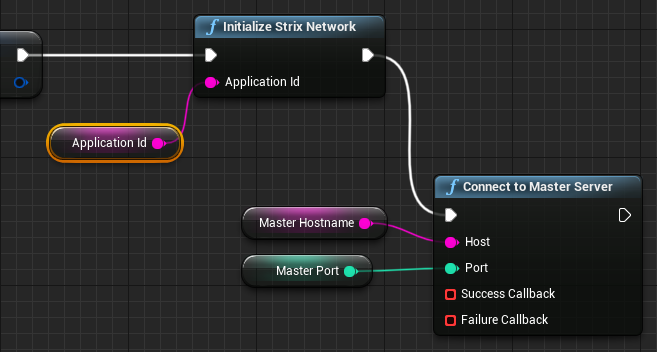
The next function we will execute is the Initialize Strix Network function. This function takes our application ID and sets up the Strix service. Next, we will add a Connect to Master Server node, with the master host name and the host port defined. This node also has two callbacks: a success callback and a failure callback. Drag off from each of the callbacks and select Create Custom Event under Add Event. Name these callbacks something descriptive, such as OnMasterConnectSuccess for the success callback and OnMasterConnectFailure for the failure callback.
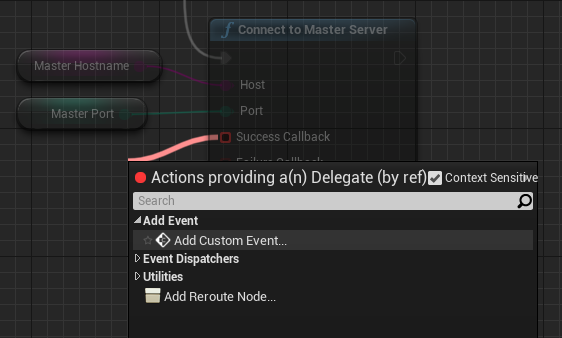
Because Strix is event driven, you will frequently see callbacks. After making the request to connect, execution will follow immediately from the output of the connect node, but in order to perform actions after the connection is established, we should execute the next steps from the OnSuccess event. It is also a good idea to include some logic to handle failed connections from the OnFailure event.
Now that we have our callbacks set up, we can connect to the Room Server. Before we do that though, we need to acquire the information necessary for this operation to work. To do so, we need to call the Search Node function. In this example, we are not using any conditions and are just picking the first node from the received array. From the OnSearchNodeSuccess event, let’s call the Connect To Room Server function. This function takes the host name, room port number, a protocol field, and a channel ID. As we did before, add two callback events, one for success and one for failure.

Creating and Joining Rooms
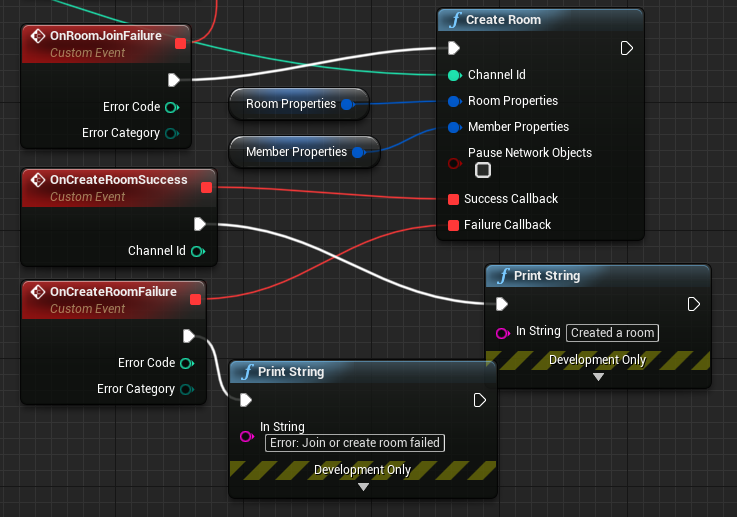
Strix utilizes two server types: master and room. The Master Server handles the initial connections, and the Room Server handles the groups of rooms where the actual games are played. Before we can join a room, we have to create one. As this is just a simple example, we are simply going to try and connect to a room. If we cannot find a room, we will then create one. Before we begin, we’ll add a delay to give us some time to create a room before we start our second player’s instance. Add a random delay (with a range of 5 secs for this example), then call the JoinRandomRoom function. This function takes the channel ID output from the OnRoomServerConnectSuccess, and our Member Properties. Once we have made those connections, let’s create two callbacks off of the JoinRandomRoom function.

If successful, we are connected to a room; however, there will be no rooms on the first client, so we will have to create one instead. To do so, we’ll add a Create Room call from the OnRoomJoinFailure event. This takes your Member and Room Properties, as well as the Channel ID from the OnRoomServerConnectSuccess event. Add the success and failure callbacks from Create Room and print some information for confirmation. If we are successful in creating a room, we will automatically join it, so there are no more functions to call from here.
This completes the basic connection and joining functionality for our game. We now have it set up so that when clients start, they will try to connect to a random room. If they fail to join a room, they will instead create the initial room. This example has a lot missing from it to be a proper implementation; for example, all of our clients have the same name. If you would like to know more about how to properly implement your connections, see Connection and Rooms and Matchmaking for more.
Note
Using GameInstance to store multiplayer functionality is suitable only for easy, sample-like games. Normally you should put this logic in somewhere else, such as in a UI widget.
Adding Replication and Synchronization to Actor
At this point, we can connect to a Strix server, and create and join a room. However, the game itself is not yet networked, and the players can’t interact in any way! Fix this by modifying the Third Person Blueprint contents to use Strix.
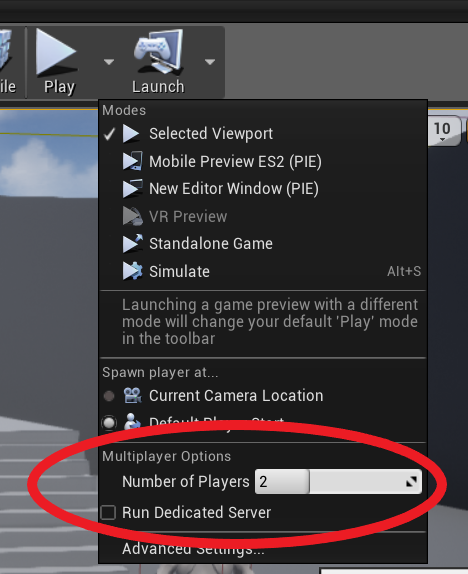
Let’s start by opening the starting map. Find the play button and navigate to the Multiplayer Options. Here, set the number of players from 1 to 2.
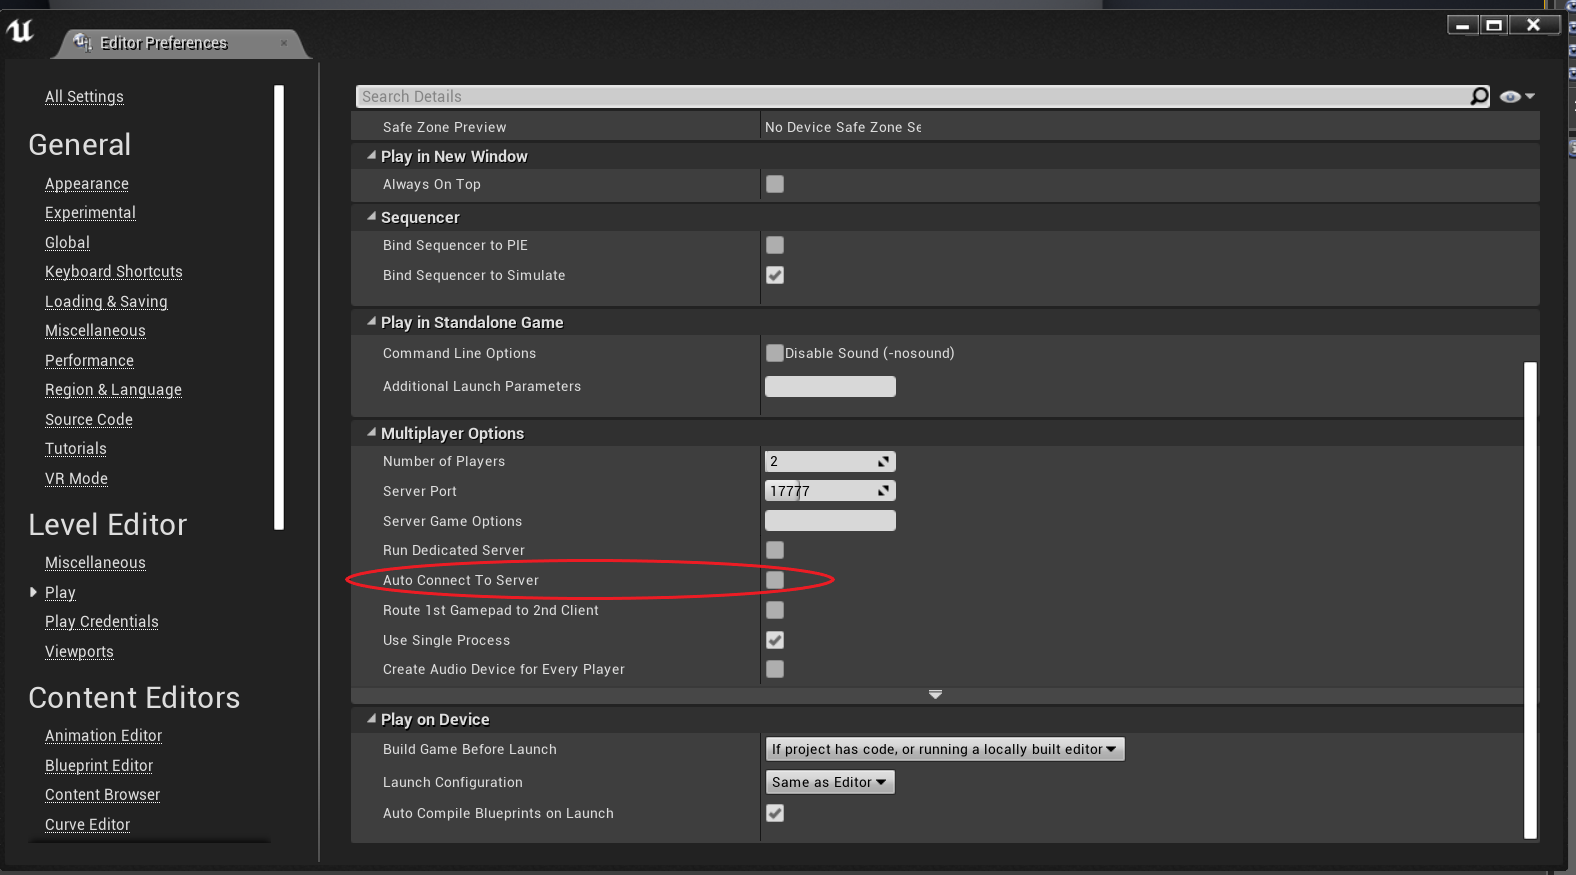
Next, open the Advanced Settings located just below the number of Number of Players setting. Scroll down to the Multiplayer Options and ensure that Auto Connect To Server is NOT ticked. Doing so disables Unreal’s built in multiplayer.
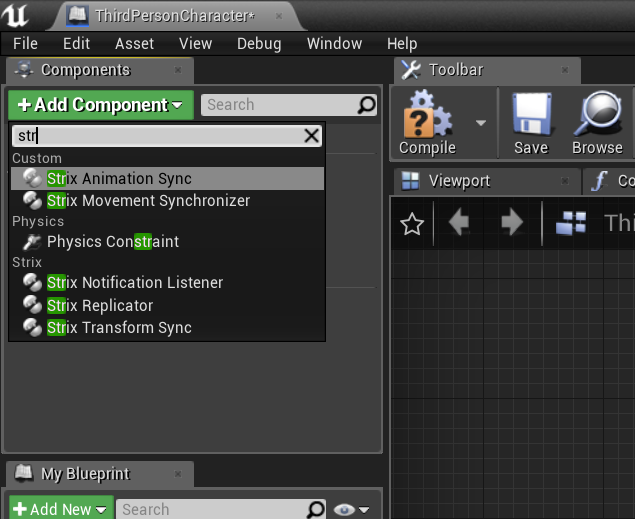
Now when we launch the game, we should see two windows. One client should create the initial room and the other should join that room after the delay. However, while the initial maps may be the same, we have not set up any synchronization or replication and our players cannot interact with each other. Let’s fix that by editing the third person character’s Blueprint by clicking on the third person character in the world and then by clicking on the Edit Blueprint in the Details panel. From the components panel in this new window, click the Add Component button and search for the StrixReplicator and add it. Do this as well for the StrixMovementSynchronizer.
Note
Strix functionality only works in Blueprints. Components do not work with Actors that don’t have a Blueprint attached to them. You should always make sure to add components and make your changes within an Actor’s Blueprint only.
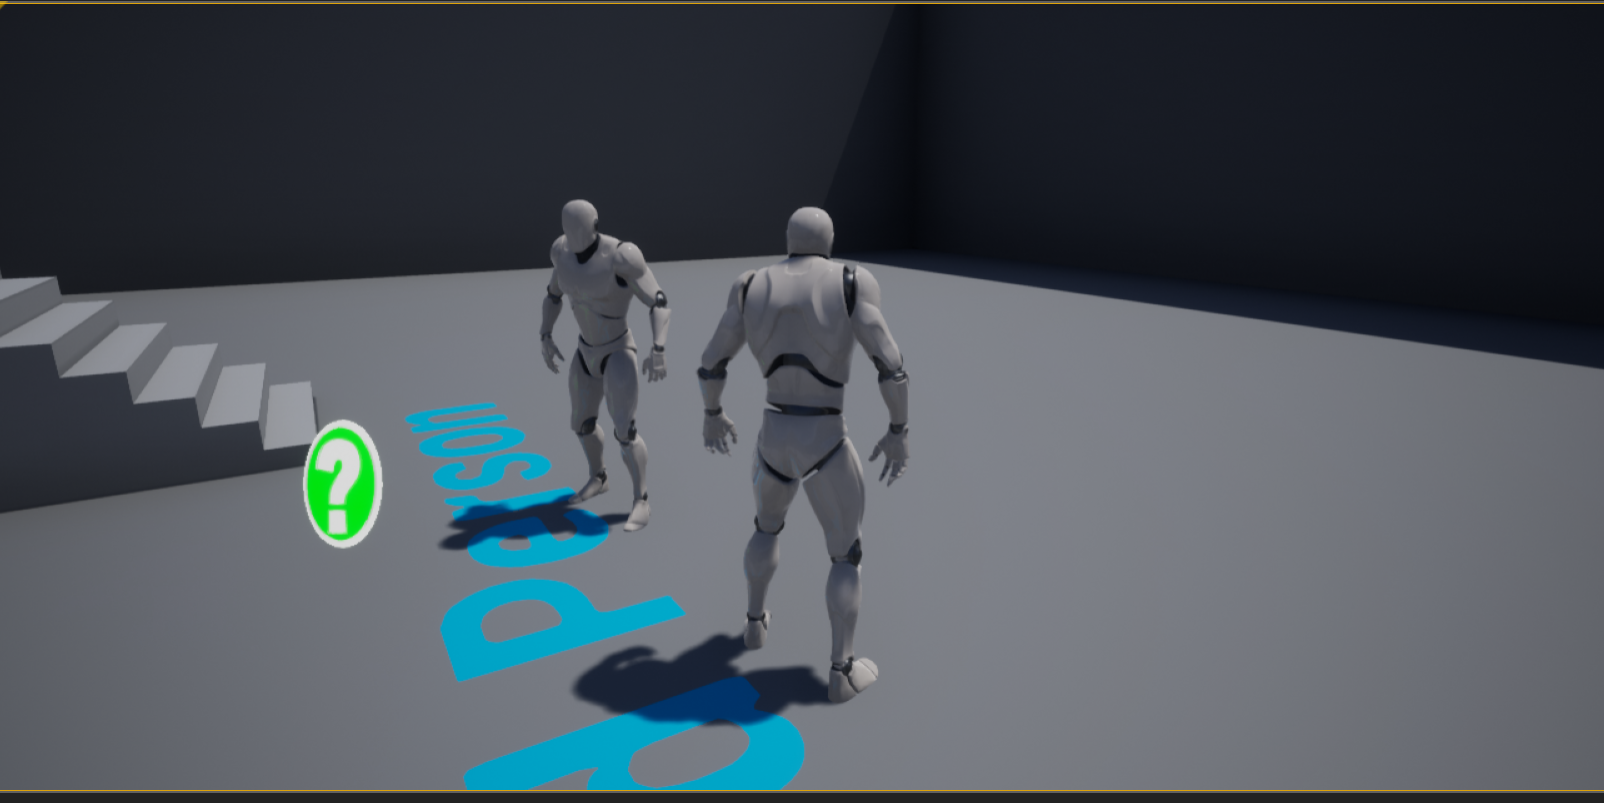
Now let’s go back to the game world. Hit play and run around with each player. Once connected, we will see that each player is moving around in the same room. Well done, you have now created a basic game using Strix!
Using RPC to add unique game features
There is a lot more to Strix, however. Let’s take a look at RPCs for example.
RPCs allow us to call functions on other machines. If we want to tell a replicated player to perform some action that cannot be simply synchronized, this is how we will do so. Indeed, when we jump around using the Movement Synchronizer, we are sending RPCs to perform the Jump action.
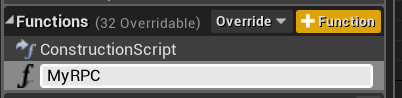
To start using RPCs, we will first define a function on the Third Person Character to call. Begin by opening the Third Person Character Blueprint and navigating to the My Blueprint panel. From there, click the + Function button to the right of Functions and name this new function MyRPC.
This will open the function itself as a separate Blueprint. We are going to use this function to change our characters’ colors. First though, let’s add an input. Doing this will show you how you can pass arguments using Strix RPCs. Select the function in the Functions panel or select the function’s starting node on the Blueprint, and then in the Inputs section under the Details panel, click the + New Parameter button.

This will create a new parameter. We will set its name to Color and its type to Float.

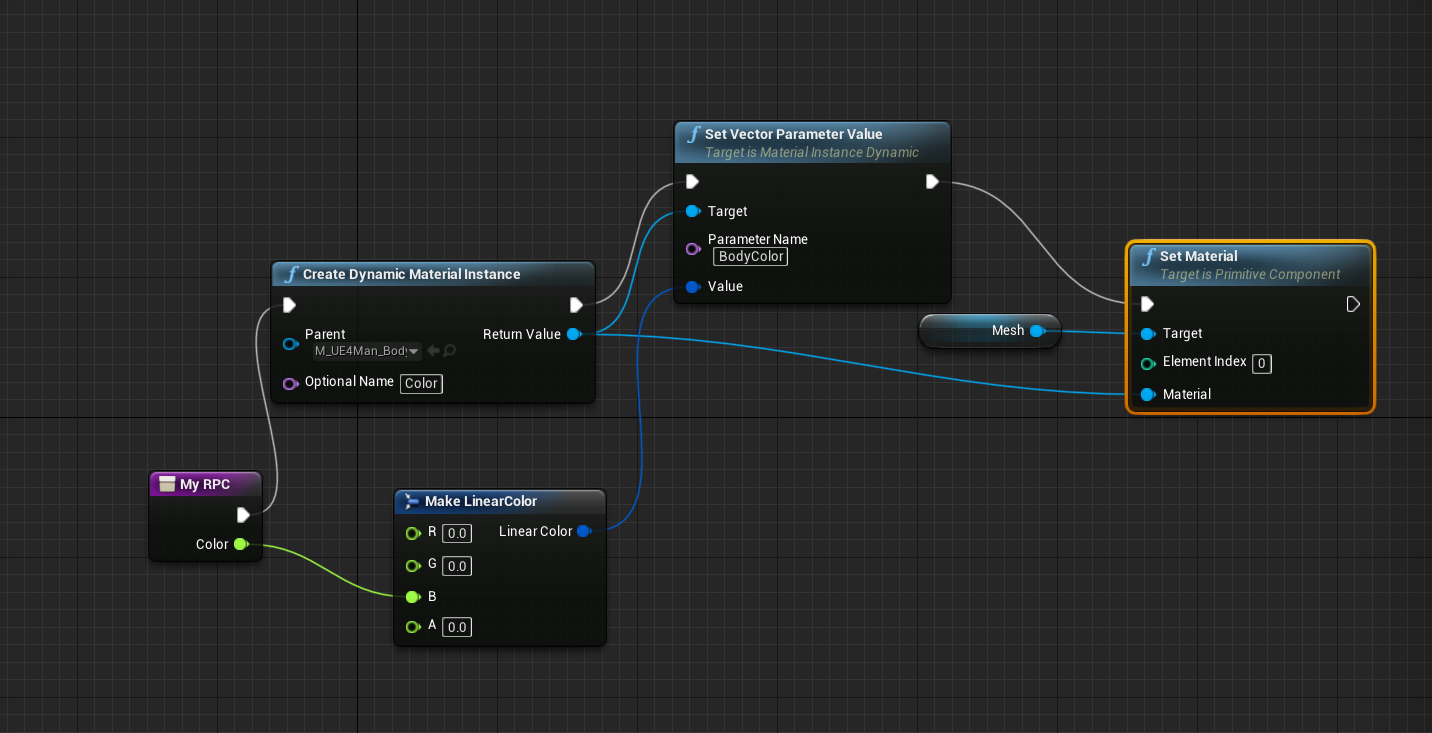
Our function node now has a Color argument. To change the color of the character, add a Create Dynamic Material Instance node, and set the parent to the character’s body material (M_UE4_MAN_BODY). Give the return value of this to the Target of a Set Vector Parameter Value node with the parameter name as BodyColor. Add a Make LinearColor struct and feed the Color argument from our MyRPC function node to one of the color values (in this case, blue) in the Make LinearColor struct. Take the return value and connect it to the Value input on the Set Vector Parameter Value node. Create a Set Material node, with the Target the Actor’s Mesh, and the Material the return value of the Create Dynamic Material Instance node. Check the image below to see the Blueprint.
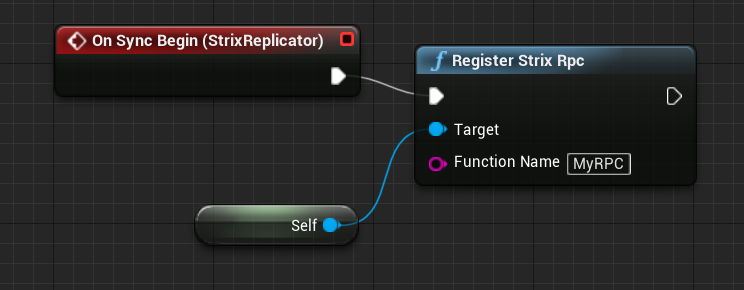
This may be familiar to you; all we have done so far is create a function. However, we can use this function with our RPC. First, we need to register the RPC. Start by selecting the Strix Replicator Component from the Components panel. Now, in the Details panel, there should be a list of Events. Click on the On Sync Begin event, and it will be added to our Blueprint. This event is called by Strix when the Actor is ready for synchronization. Next, connect the event execution to a Register Strix RPC function. Lastly, set the target to self, and the Function Name to the name of our function MyRPC.
Now we have registered our RPC function, but we still need to call it. Our character already has a Jump function, so we’ll make use of this logic. (We’ll just use the standard keypress logic for now and ignore the touch input). To do so, drag out from the execution pin of the Jump node, and call MyRPC. From there, create a float variable, named Color, and set it to some value. Let’s go with 1 for the max blue value.
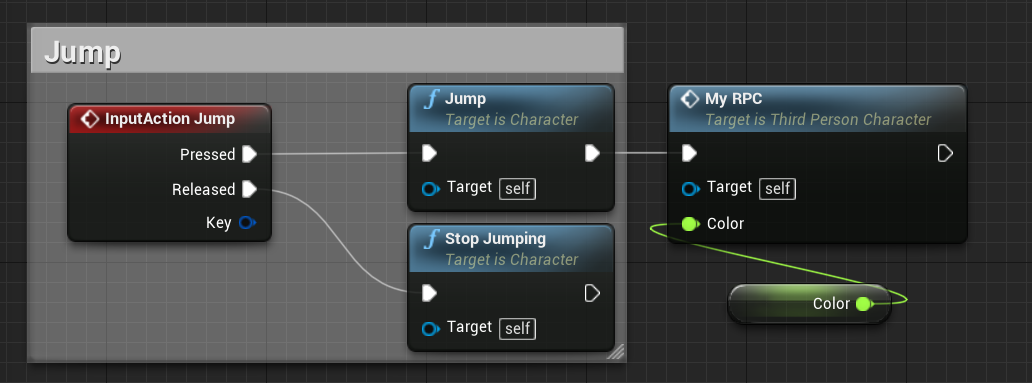
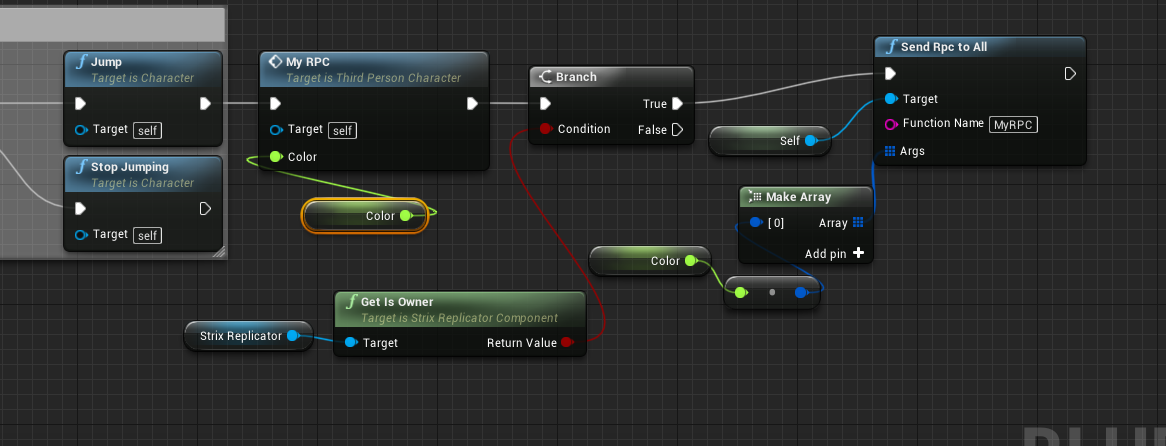
Now, if we jump, we will see that our character’s color changes to blue. However, our character won’t update on the replica, as we haven’t sent the RPC to all yet. To do this, create a Branch from the MyRPC call after the Jump call. Next, drag the Strix Replicator Component from the Components panel into the Blueprint and add from its reference output a Get Is Owner node. Get Is Owner is Strix’s way of informing us of who is the local instance or a replica. Now, feed the result into the Branch Condition. If the condition is True, we want to call the RPC, but if it is False, since we are a replica, we don’t want to send a redundant RPC. In truth, this will never fail, because we are using an input event to call the RPC, and that means that only the owner Actor will ever reach this code, but this shows you how to differentiate between the owner and a replica.
From the True execution pin on the Branch, create a Send RPC to All node. Next, set the Target as Self, and the Function Name as MyRPC. Dragging out from Color, you should be able to place a ToStrixRelayArg(float) conversion. Connect this output to the Args input on the Send RPC to All node.
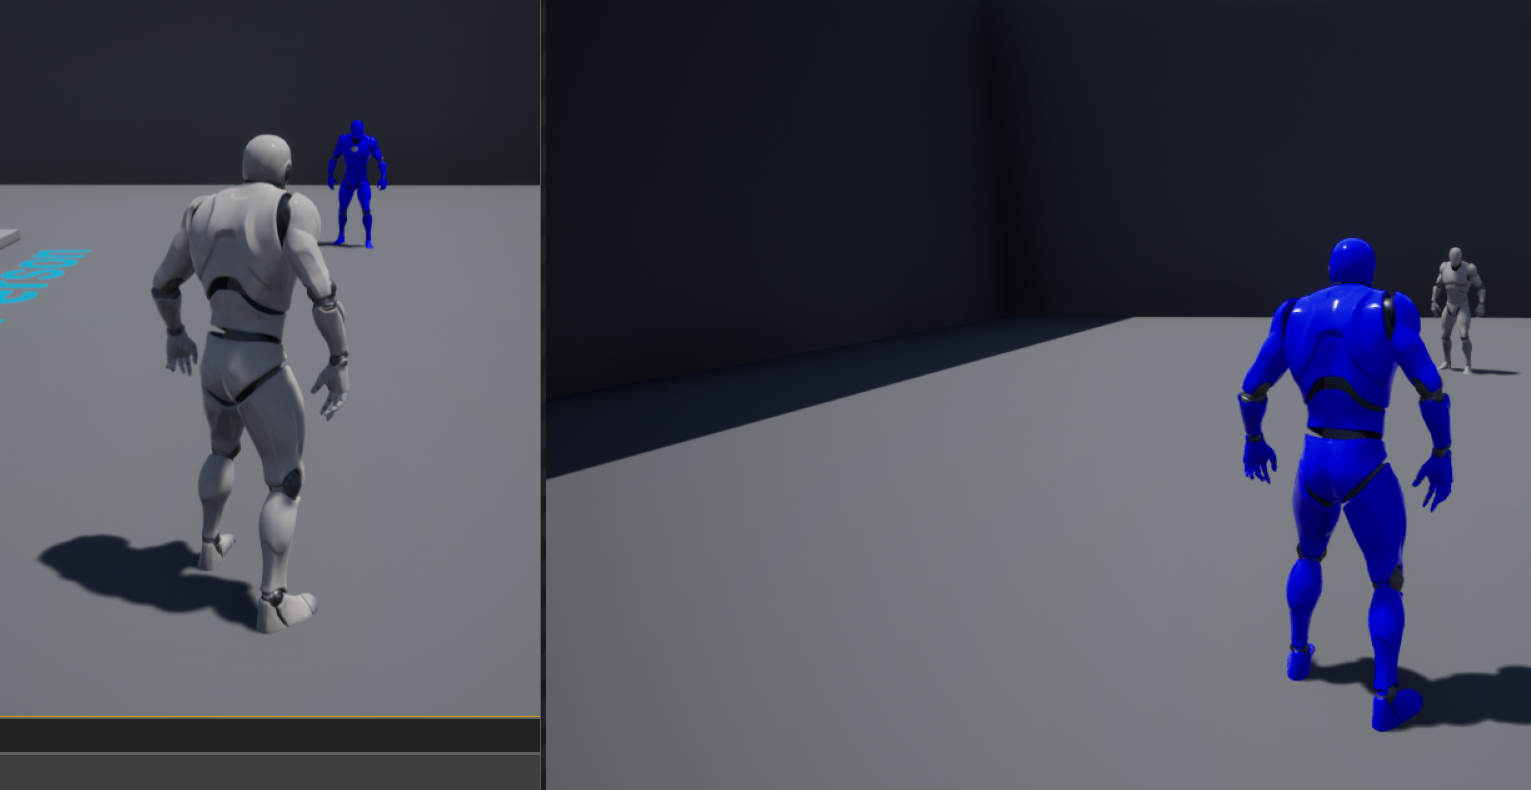
Now, when we jump on the other player’s window, we will see that our player becomes blue. As you can see, the most complicated part of using Strix RPCs is building the actual functions we plan to use in the first place. The actual RPC calls are quick and easy, and we’ve provided various types of calls and different argument conversions for you to use.
Using synchronized properties
Strix also provides synchronized properties. These properties may synchronize variables of many different types across your clients. We can reuse our MyRPC function to show this.
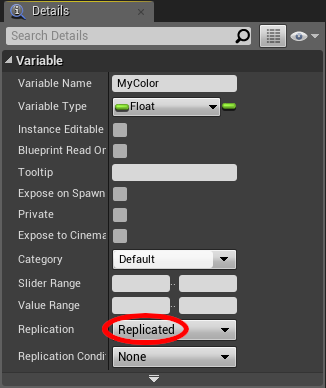
Firstly, let’s create a float variable called MyColor and in its Details panel, set Replication to Replicated.
Next, from an Event Tick, we want to set our color to our delta value and update the character’s color. From the Event Tick node, let’s check if we are the owner or not as before. If not, we’ll call our MyRPC function with MyColor as the input. This will update the actual color for the replica. If we are the owner, check if MyColor is greater than or equal to 1.0. If so, set My Color to 0; otherwise, add the value of delta to it. This means that our color will increase over one second to the max value before dropping to 0 and repeating. Now connect our function call again so that the local player’s color is updated.

Now we can see the colors changing on both of our characters in game. Note that the transition is not entirely smooth as the Strix Replicator is only replicating every 1/5th of a second. This can be changed in the Replicator’s Details panel.

Well done! To familiarize yourself further, consult the rest of the documentation, or you can play around with your new example project.
Thanks for using Strix!