Installing SDK
This page explains how to install the Strix Unreal SDK into your Unreal project.
Downloading the SDK
You can download the Strix Unreal SDK from the Downloads page on Strix Cloud. You need an account on Strix Cloud, and you can sign up from here if you don’t have one.
On the Downloads page, locate the card for StrixUnrealSDK, and click the download button to download the latest version. (It is version 1.7.1 as of this writing.)
Expanding the downloaded zip file shows you several files in folders. Locate the folder StrixUnrealSDK-X.X.X > StrixUnrealSDK > Plugins > StrixSDK among them. The folder and its entire contents form the Strix SDK plugin.
Strix Unreal TPS sample game
Another folder in the downloaded zip file, StrixUnrealSDK-X.X.X > Sample, contains a sample game using Unreal Engine and Strix Unreal SDK. It is called Strix Unreal TPS, and it is a separate sample program from the one we will examine in sections “Quickstart” or “Strix Unreal Sample”.
You need to embed your server information in the sample before building. Follow the instruction included in StrixUnrealSDK-X.X.X > Sample > README.txt to use the sample. Note that the Strix Unreal SDK is installed in this sample project, so you don’t need to do it by yourself.
Installing the SDK to an Unreal project
Strix Unreal SDK needs to be installed into an Unreal project that you want to use Strix within. So, first create a project by Unreal Editor as usual, then close the Unreal Editor to install the SDK to. (Alternatively, you can use your existing project that you want to add online features to).
Perform the following steps to install the SDK to an Unreal project:
With Windows’ Explorer, open the folder for your Unreal project.
Locate the Plugins folder in the Unreal project folder (the folder your
*.uprojectfile resides). If the Plugins folder doesn’t exist, create one.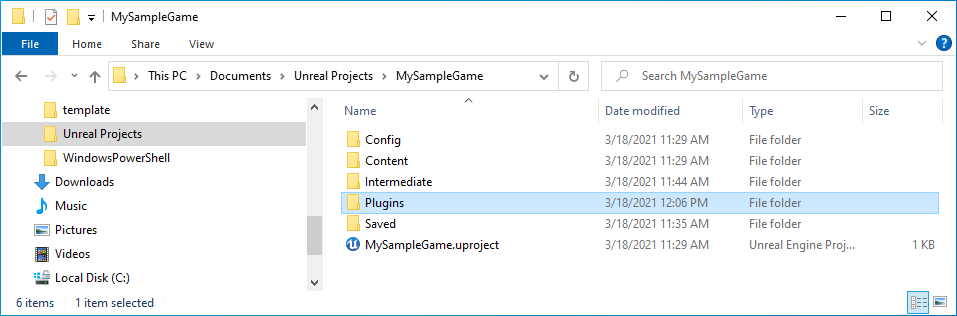
Copy the StrixSDK folder (below Plugins zip folder) extracted from the downloaded zip file as well as its entire contents into the Plugins folder in your Unreal project.

Open your Unreal project with Unreal Editor. You will see the following message as Unreal Editor reads the project:
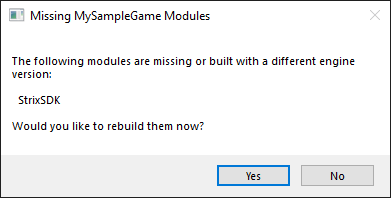
Click “Yes” to rebuild. (See below if you experienced an error on rebuilding.)
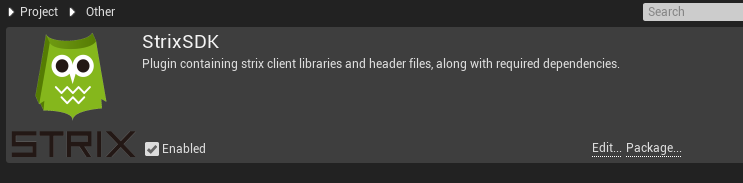
After the rebuild process finishes, the Unreal Editor opens as usual. You will see the Strix Unreal SDK in the Project > Other section of your Plugins settings.
Note
When using Unreal Engine version 4.22 or earlier, the file StrixSDK.uplugin is different for iOS builds. If you are building for iOS using one of those versions, ensure that you have the file in the Strix SDK plugin directory.
In case of an error
You may see, however, an error message like the one below during or after the rebuild in the step 4 above. (“MySampleGame” is the name of an Unreal project.)
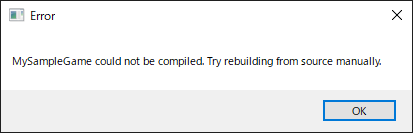
Two causes are possible for this error: Visual Studio is not installed, or incompatible intermediate files are left over from the previous sessions.
Installing Visual Studio
In order to rebuild your project from source, you will need to have Visual Studio installed on your PC. If you don’t have it installed, you can follow this link to download one.
Note
Visual Studio is a product of Microsoft and not of ours (Soft Gear). Please read its licensing terms and other legal documents carefully before downloading, and download only if you fully agree with them.
Removing intermediate files and rebuild
After installing Visual Studio (or if you already have one), perform the following steps on Windows’ Explorer:
Remove the Saved, Intermediate, .vs, and Binaries folders, and remove all the Visual Studio project files from your project folder.
Right click on the
*.uprojectfile in your game’s project folder and select Generate Visual Studio project files.After the files are generated, open by Visual Studio the
*.slnfile that was created.Make sure that the Solution Configuration is set to Development.
From the Build dropdown select Rebuild Solution.
Once the rebuild has finished, try opening your project by Unreal Editor.
C++ Projects
Unreal Engine supports both Blueprint projects and C++ projects, and Strix SDK supports both, too. However, if you are using Strix SDK for a C++ project, you may encounter a compile error when building your project, even after properly following the above installation steps.
To avoid the issue, add the following line (or an equivalent statement) in the file named Source/<project name>/<project name>.Build.cs:
PublicDependencyModuleNames.Add("StrixSDK");
For an example, you can find the following line
in the StrixUnrealTps project (included as a sample game in Strix Unreal SDK),
where adding the string "StrixSDK" at the end of the array causes the equivalent effect.
Sample/Source/StrixUnrealTps/StrixUnrealTps.Build.cs:
PublicDependencyModuleNames.AddRange(new string[] { "Core", "CoreUObject", "Engine", "InputCore", "StrixSDK" });