Channels
This is the final feature we will cover in this sample. You may have noticed that a lot of the Strix functions take a channel ID. The channel ID is a representation of separate room connections. In Strix, connecting to multiple rooms at once is possible, and this allows you to create things such as chat channel systems, strategic overlays, etc.
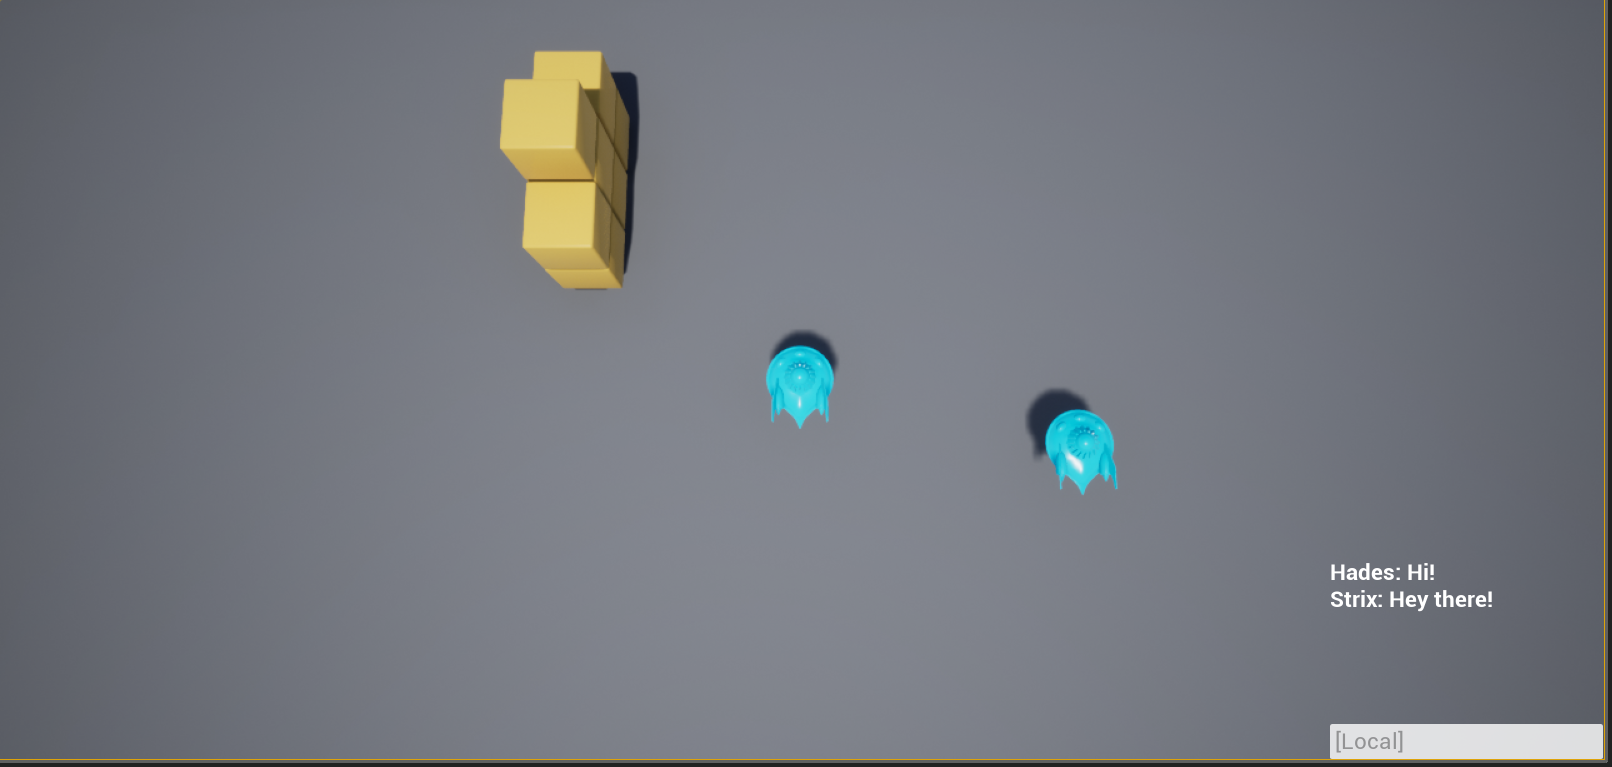
Here we have a top down shooter with a built-in chat system. You can chat by pressing Enter, inputting your text, and then pressing Enter again. The chat has a global and local channel, which you can switch using Tab. By typing TO: then a space followed by the player name immediately after, you can send a message directly to the player whose name you entered.
Let’s take a look at the Blueprint for our chat system. Start by opening the TwinStickPawn Blueprint in the ChannelsBP > Blueprints folder. The Pawn creates the chat window, and once synced, it connects to/creates the chat rooms.
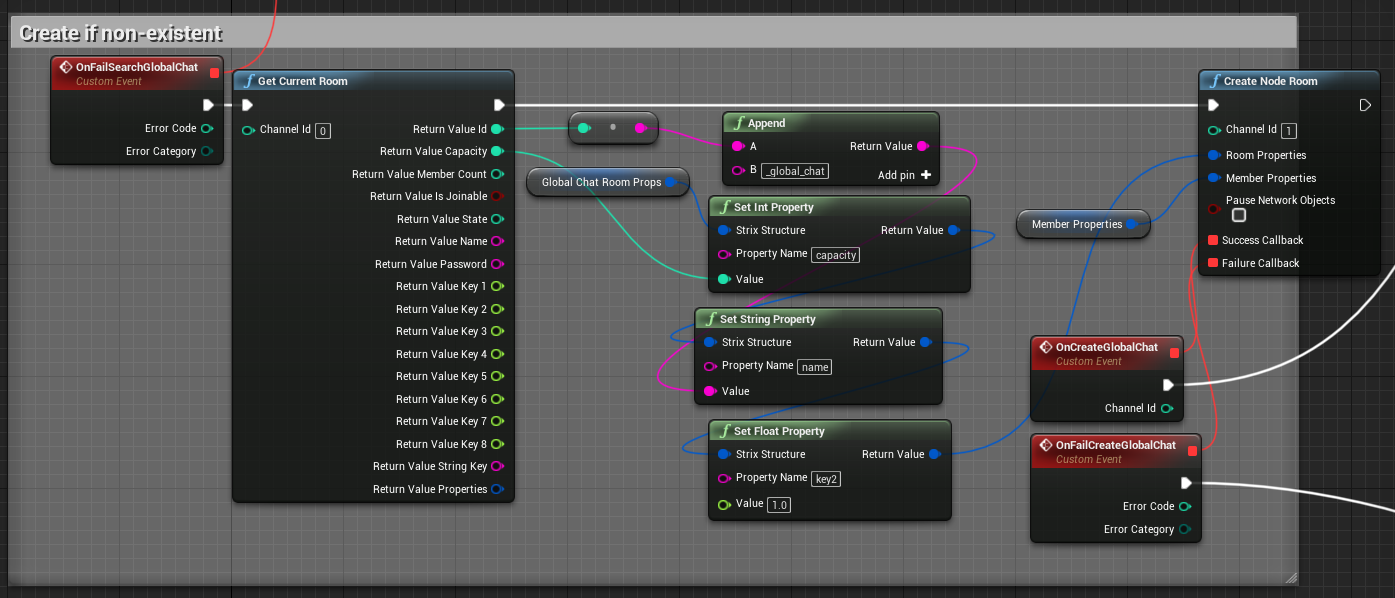
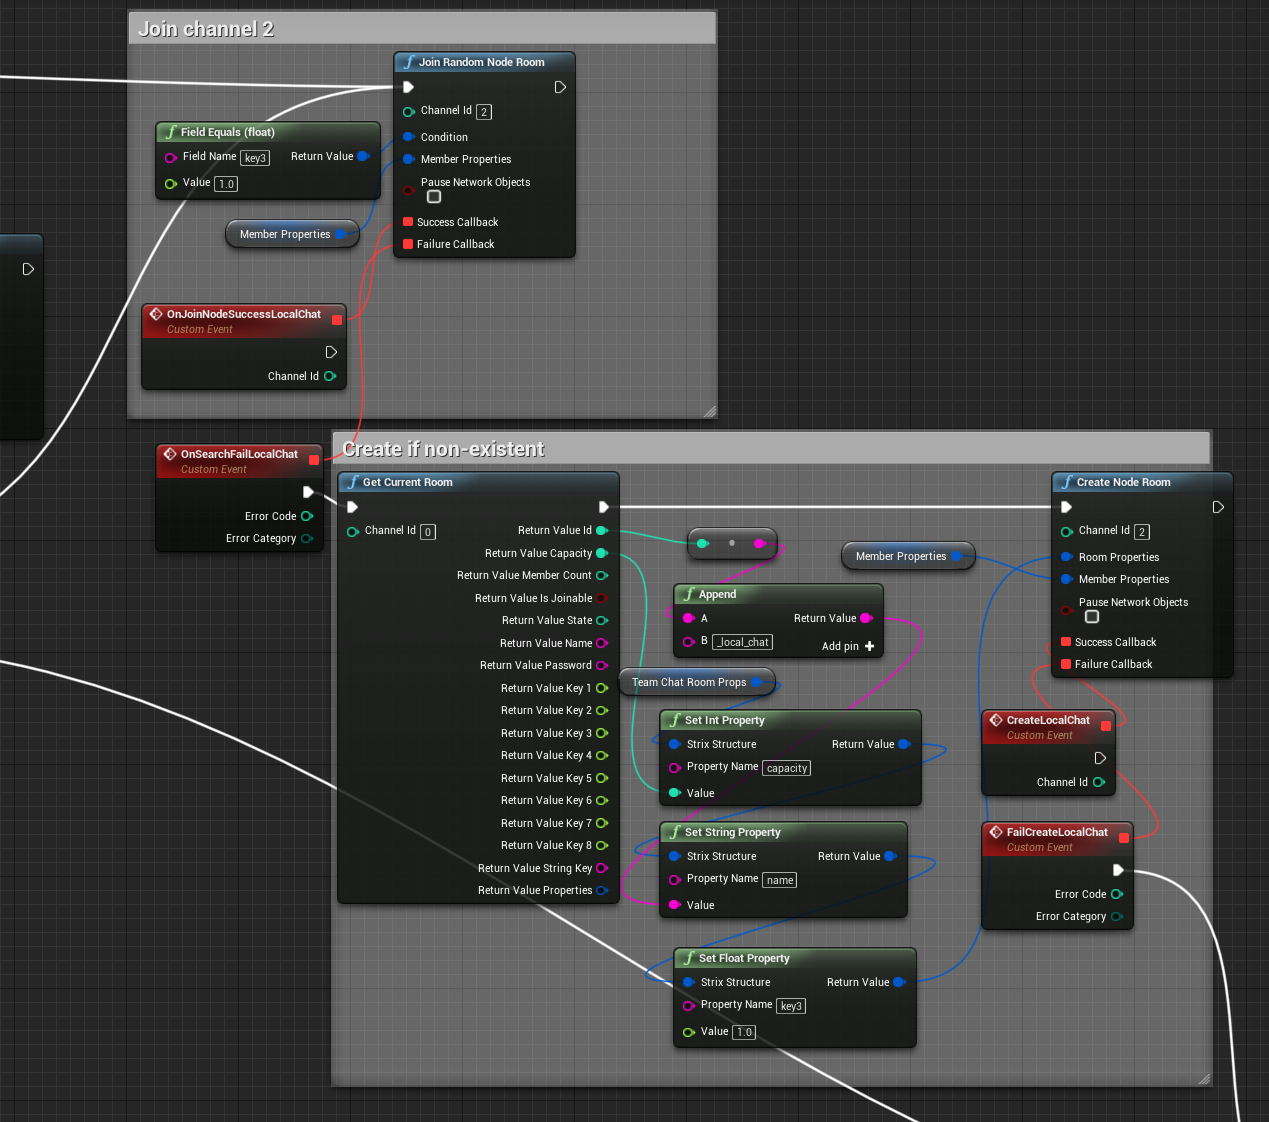
The Pawn first tries to connect by filtering with a key value in the room properties. Here, we use key2 = 1 to imply the room is a global chat room, and key3 = 1 if local. This prevents us from connecting to a game room when we call Join Random Node Room (calling this function will connect to a random room, so if we had two game rooms up, it is possible for it to connect to the wrong room). If there is no room, one is created with a suffix and some properties. Each room has its own channel ID.
Note
Channel IDs are separate from Room IDs and can be initialized as any value you wish.
Channels are separate room connections. All operations on a channel only apply to the room on that channel.
We have two Chat objects in the level. These will contain our logic for chatting. Chat1 is our local channel and Chat2 is our global.
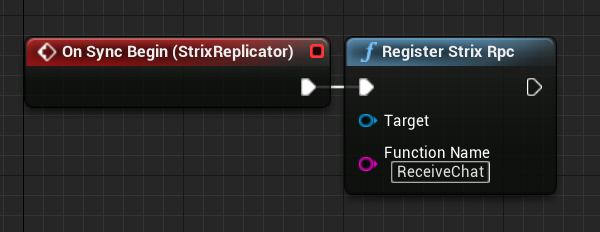
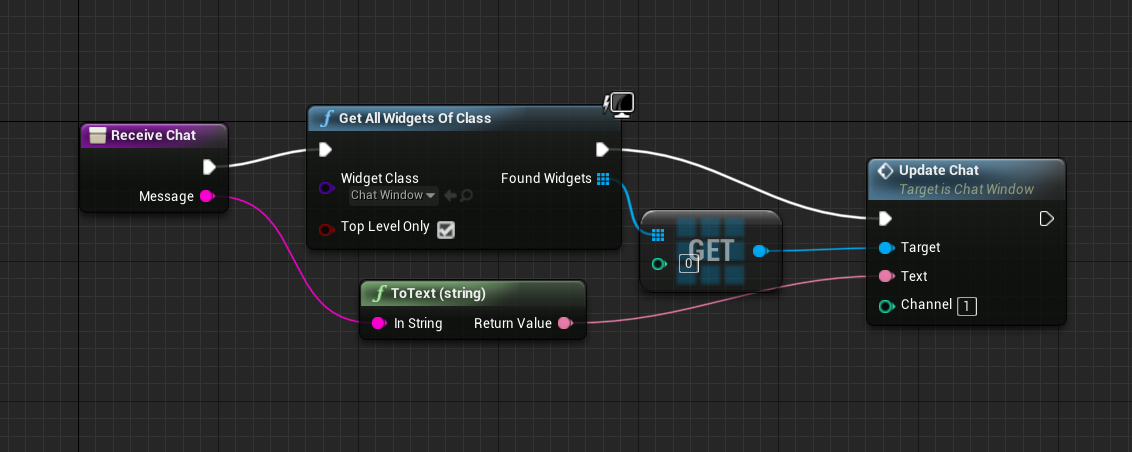
Opening the Chat Blueprints, we see that we’ve registered a ReceiveChat function once synchronized. This function takes a message as input and updates the ChatWindow widget.
In the ChannelsBP folder, we have a ChatWindow widget. Open this to see how RPCs are being sent.
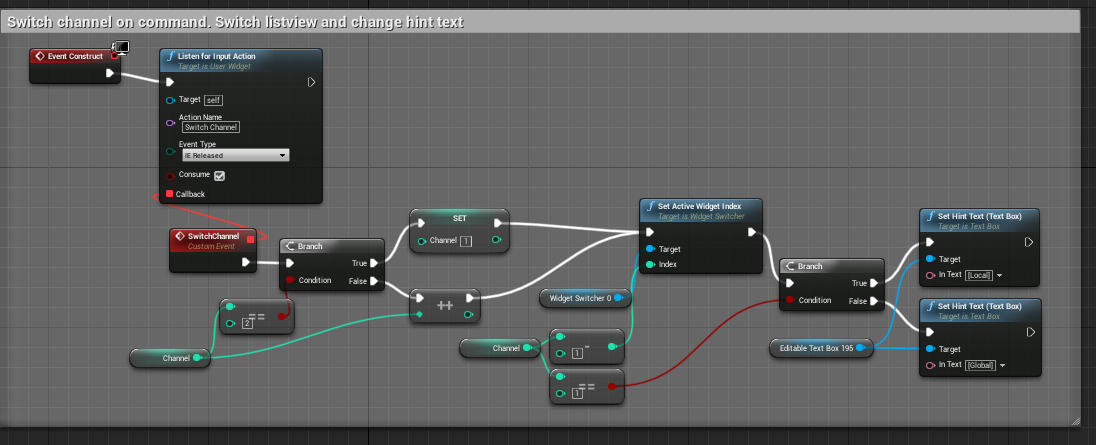
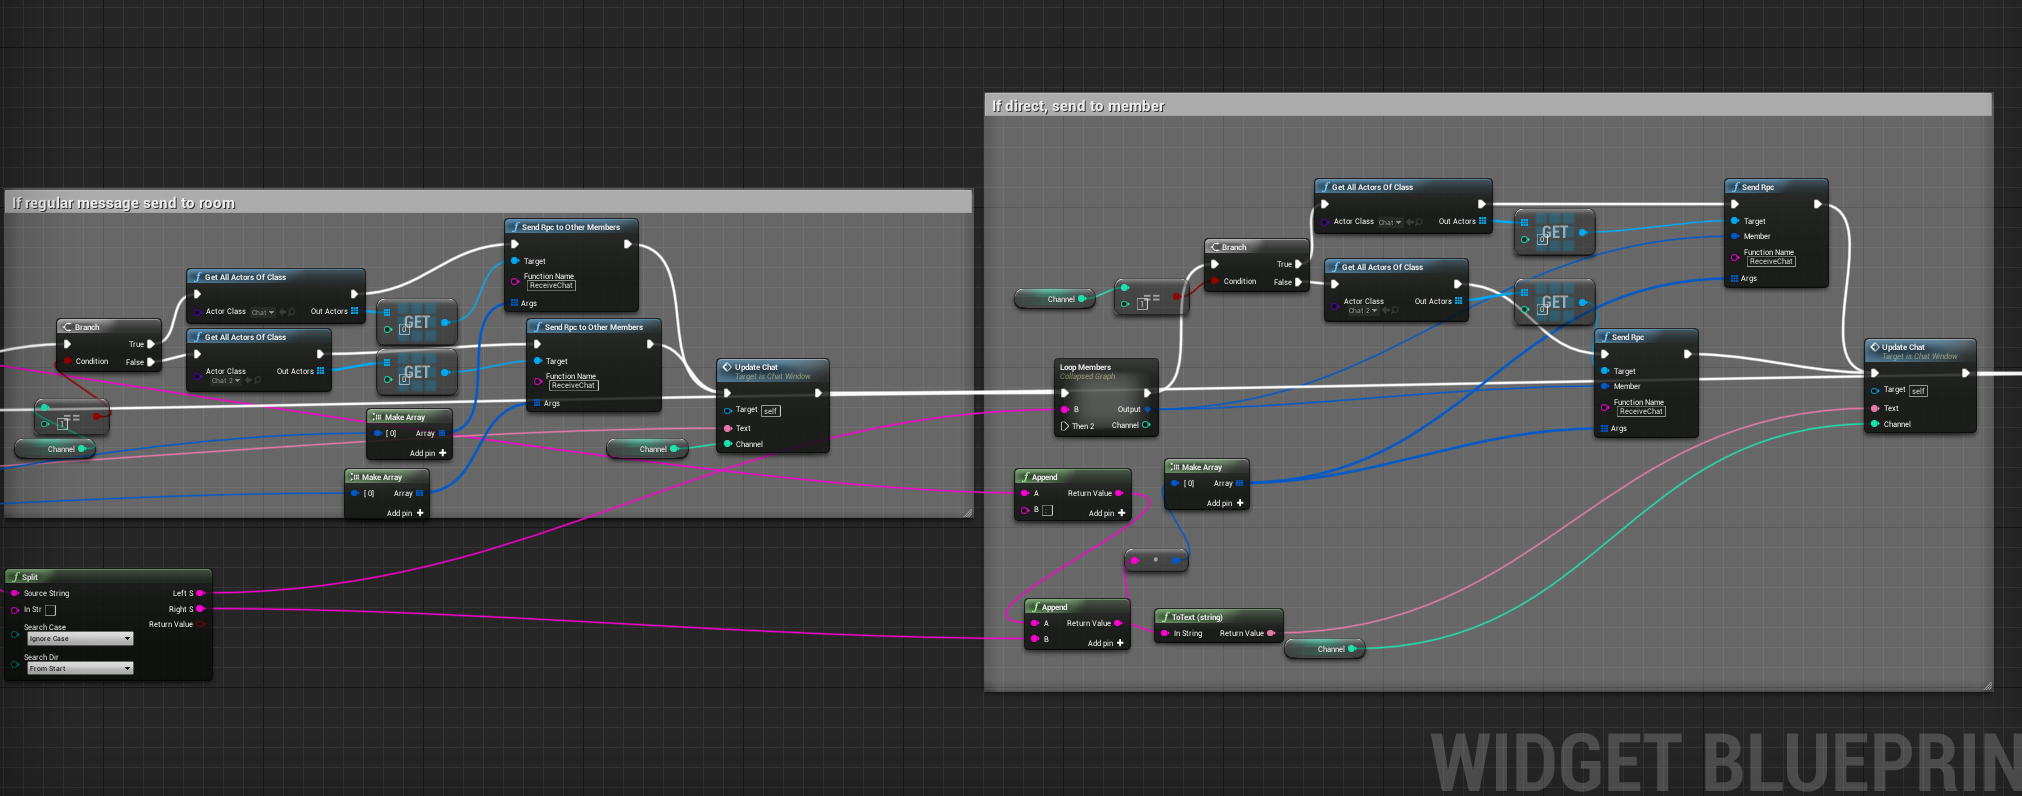
Here, we switch between channel values, and upon pressing Enter, take the text in the text box, parse it, and send either an RPC to Other or an RPC to Member function using the chat objects so we know which channel is used. The direct RPC requires we know the member as a Strix Room Member struct. We can get this value by calling the Get Current Room Members function and comparing the intended recipient’s name to the names of the members.
You can test out the chat system to see this in action.
Note
Strix Replicators take channel IDs. This lets you have multiple Actors replicating in different rooms. For example, you can have strategic markers that differ based on what group your player is in.
Thanks for choosing to use Strix. The rest of this documentation goes into more depth about the features available in Strix, so check it out if you’d like to know more.