RPC and Animation
Let’s move on to the next map: RPC and Animation. This map will showcase the Strix Animation Sync component and Remote Procedure Call.
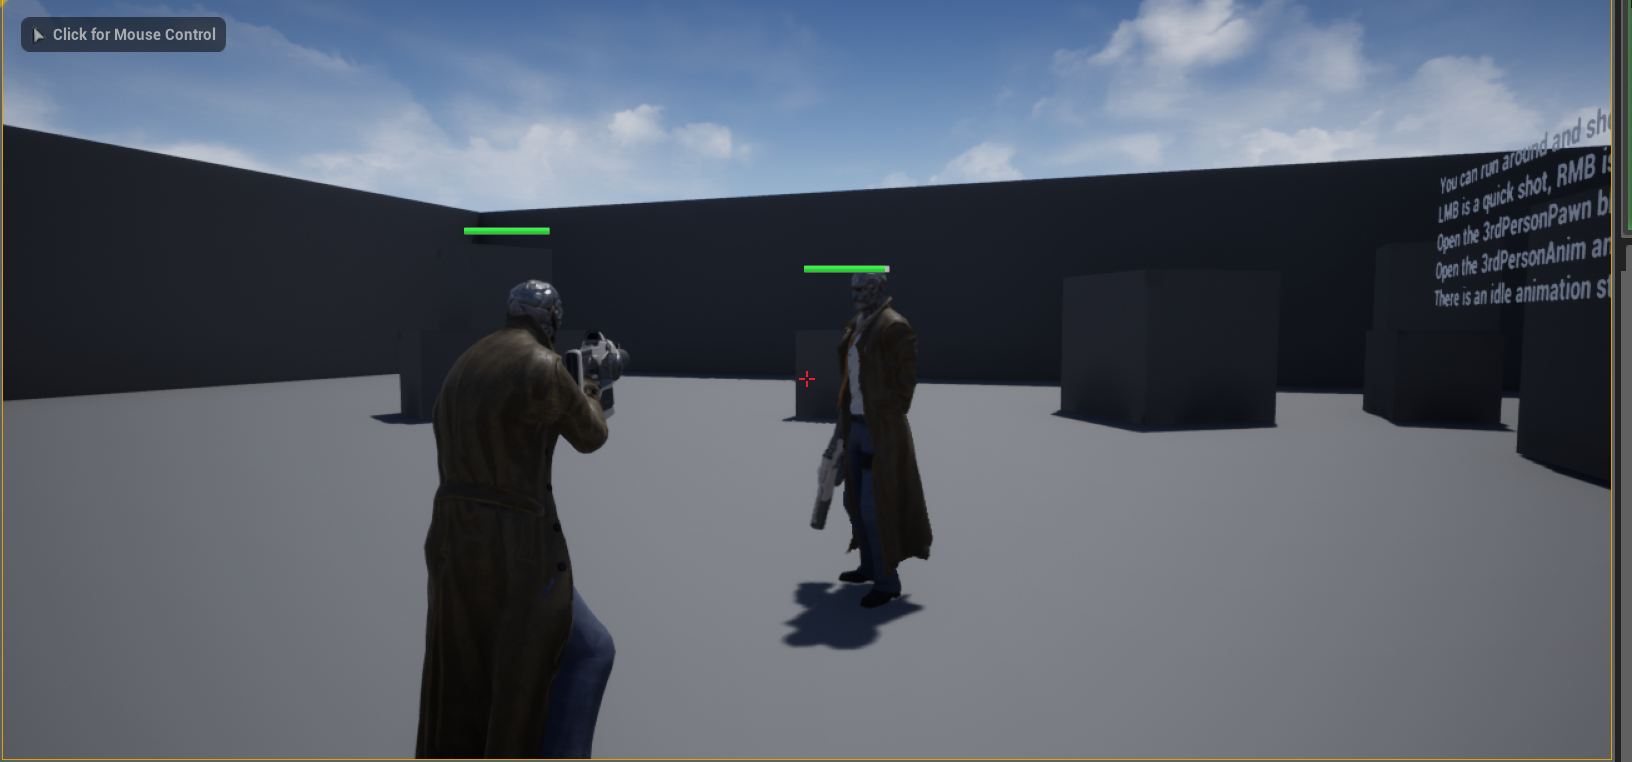
Here we have two characters who can run around and shoot each other. They also have an idle animation that plays when they haven’t moved in a while.
Let’s begin by opening the 3rdPersonPawn Blueprint in the RPCAnimationReplicationBP > Character > Blueprints folder.
This is a fairly complicated Blueprint with a few functions. The characters can shoot a light attack or heavy attack, with different rates of fire, and characters take damage when hit. When a character’s HP is depleted, they disappear and then respawn again. Now, let’s look into the relevant parts that require Strix.
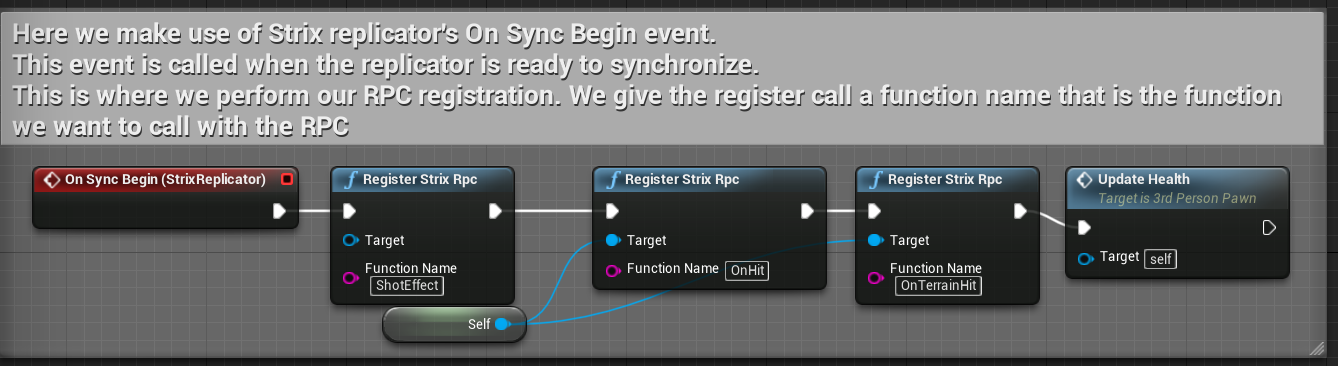
The first part is the RPC. RPC stands for Remote Procedure Call. RPCs are functions that are initiated by a client to be called on other clients. In this case, we want to call when we attack and when we or the terrain takes a hit. In Strix, we first have to register our RPCs to call them. From On Sync Begin, we will call Register Strix RPC for each RPC we want to register, with the Target set as Self and the Function Name set as the name of the function in the Blueprint. This has to be done on the replica too, so we shouldn’t check if we are the owner. This needs to be done on the On Sync Begin event because otherwise we won’t be able to know if the Replicator is ready yet.
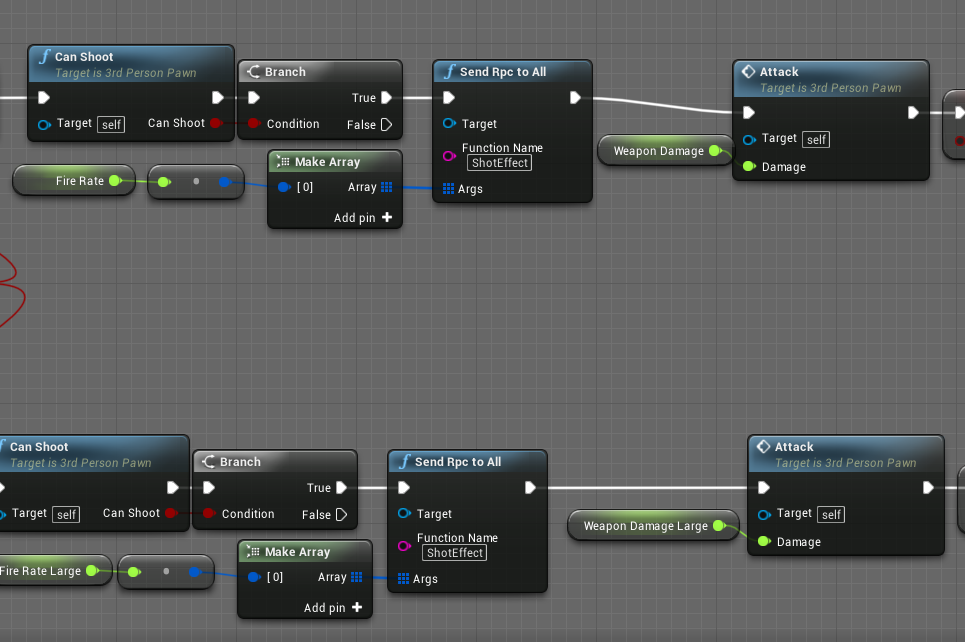
When we shoot the gun, we call our RPC to make the attack visible. In order for this to display on every player’s screen, we call the Send Rpc to All function with the ShotEffect as our Function Name. Doing this calls on all members, including the local, animating the shot and muzzle flash. Next, we pass in the Fire Rate variable to determine the speed of the animation. Strix RPCs take an array of Strix Relay Arguments, and the Strix Unreal SDK provides the requisite type casts for this. Be careful with what arguments you pass, as RPC calls will fail if you pass incorrect arguments.
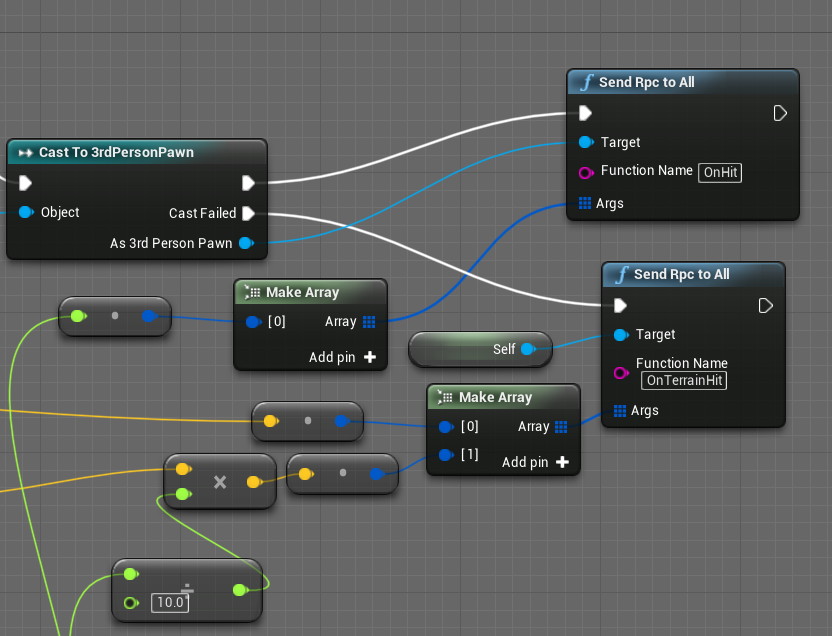
We call our Attack function on the local which determines where each shot lands. The Attack function determines if hits were scored on terrain or a player and calls the relevant RPCs if so. These On Hit calls show effects and apply damage to the players. Note that these RPCs also take arguments, so it’s a good idea to think about how much data to send, and how much to process when using RPCs. You only need to send enough data to allow the replica to produce the same result as the local. It’s usually better to favor spreading the processing time around clients than sending a large amount of results.
Note
While RPCs are registered on both the local and remote, the call should be initiated only by one. If not, we would end up calling the on hit RPCs twice, but we’ve already locally applied the hit.
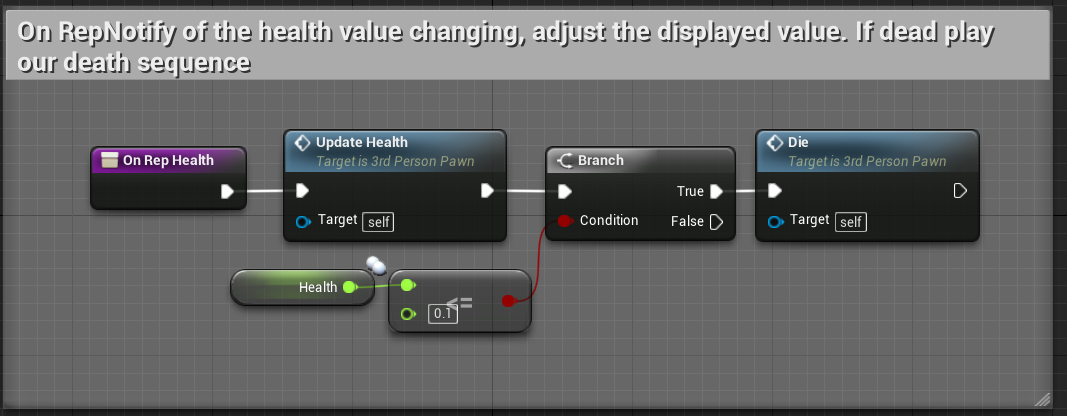
The final thing to look at in this Blueprint is the RepNotify functionality. We have a health value for our character, and when the character is hit, we subtract some amount of damage. We could sync this by setting the variable to Replicated; however, every tick we would have to check the value and update our health bar to show this. For events that don’t occur every tick, it may be better to set the variable to RepNotify. RepNotify generates a function that will be called every time the value changes. In the On Rep Health function, our health bar is updated, and if a character has taken too much damage, they are killed and then respawned.
Take a look at this Blueprint and read through the documentation for a better understanding of RepNotify. Next, let’s open the 3rdPersonAnim Blueprint in the RPCAnimationReplicationBP > Character > AnimBlueprint folder. This is the animation Blueprint for the character and where we’ll conduct some synchronization of the animations.
There is quite a bit to animation, but synchronization is straightforward. As before, we need to check if we are the owner before we set replicated values, and we need the extra steps of calling Get Owning Actor and Get Component by Class to return a reference to the Strix Replicator. Other than this, we just need to determine what values to synchronize.
Characters that are replicated will likely have decent animations and as you’ll notice, we haven’t had to add a Strix Animation Sync component until now. The character’s animation is partly controlled by the player, so in this case we can’t know the correct control rotations. We sync the Control Rotation and Actor Rotation values to fix this. We also need to sync the delta time value to interpolate rotations correctly. This works the same as the Strix Replicator. You can think of the Animation Sync component as simply the Replicator equivalent for animation Blueprints.
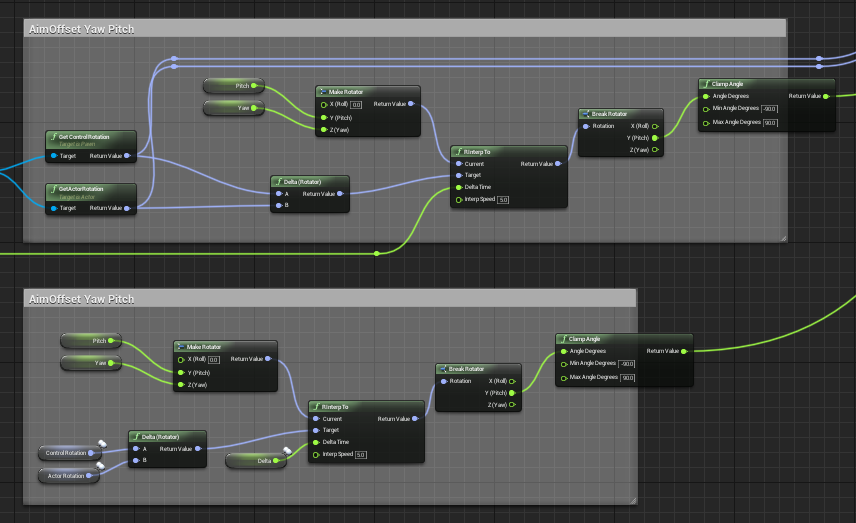
We have two values added here, Time Idle and isShooting. Time Idle is used to determine when we will swap our animation state to the Idle animation, and the isShooting variable determines if we should break out of it early because we are shooting. With all these values synced, our animation can work correctly.
Note
Most of the time with Strix, you can attach a Replicator and a Movement Synchronizer, and all will be well; however, animations are a little trickier and should be checked to make sure they are compatible with being replicated to clients.
Note
The Strix Animation Sync component synchronizes values across all graphs. However, you cannot yourself set any values in State Machines or the Anim Graph, only the Event Graph.
Once you are finished with the shooting example, let’s move on to the final map.

Note
The final map creates 3 rooms. Join the non-chat room.