Configuring Servers
Expand a card for a cluster on Servers Page on Applications Dashboard and click on Configure button with one or more servers checked opens Configure Server popup.
Configure Server popup appears differently depending on the server roles.
Configuring a master server
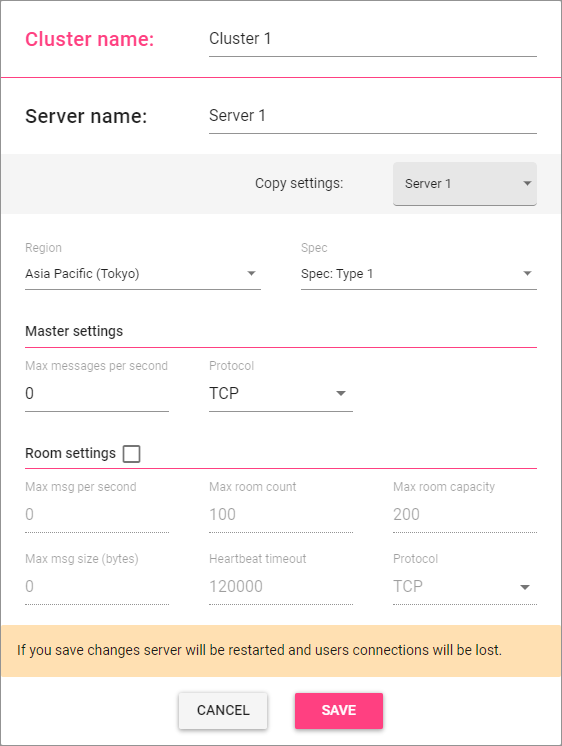
Each cluster always has a single master server. Clicking on Configure button with only the master server checked opens Configure Master Server popup. This popup contains a same set of options as the Create Cluster popup after clicking on Show more options for Creating a Cluster. See Creating a Cluster for details.
The popup has a Copy settings dropdown on it. It lists server instances in the same cluster, and you can select one from the dropdown to copy the settings from the selected server to the popup.
Configuring a single room server
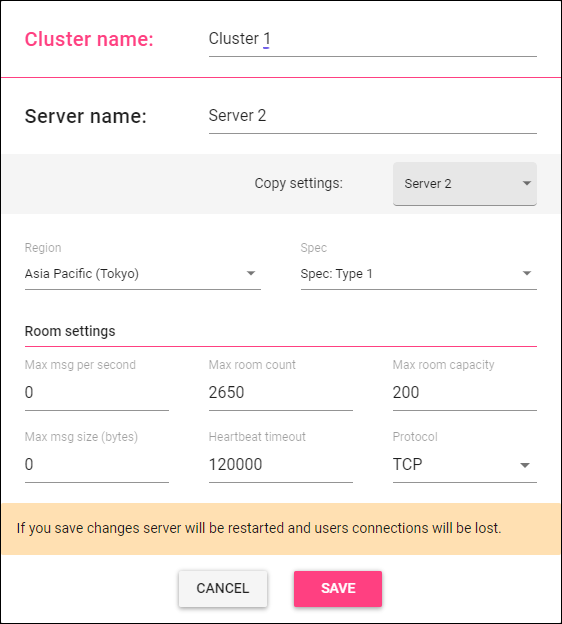
Clicking on Configure button with a room server that is not a master server checked opens Configure Room Server popup. This popup contains a same set of options as the Configure Master Server popup except options for a master server. The popup has a Copy settings dropdown on it.
Configuring multiple servers
Clicking on Configure button with multiple servers checked opens Configure Multiple Servers popup.
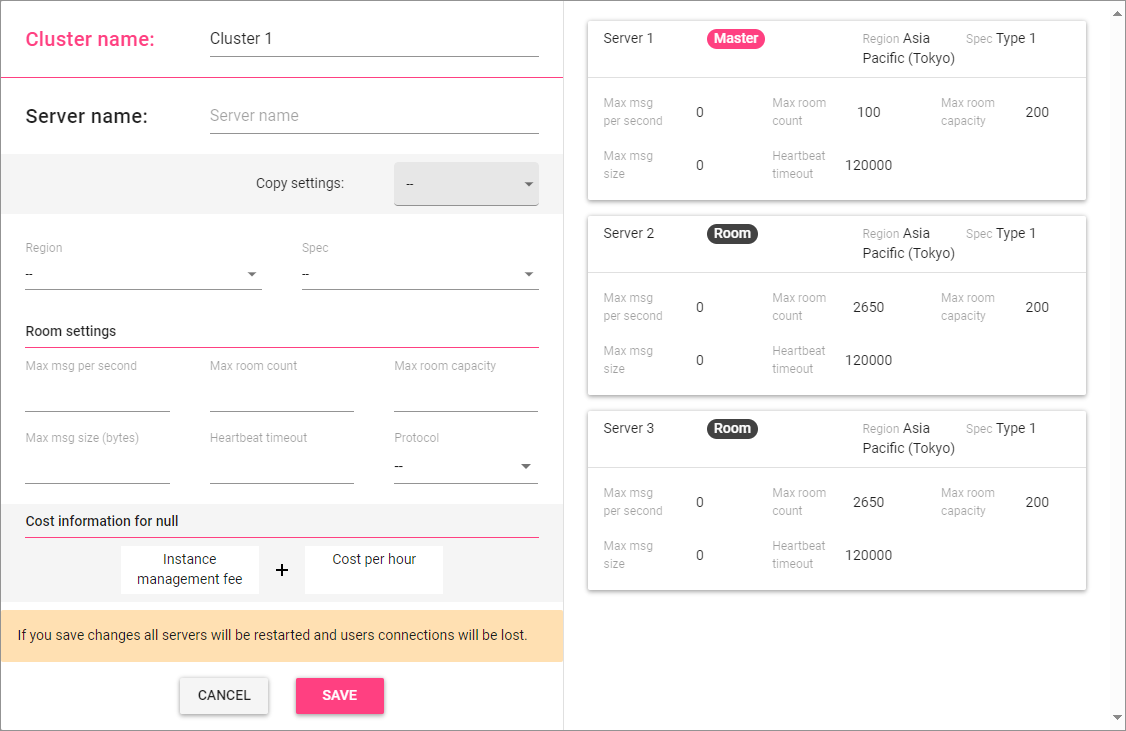
The right half of the popup shows the list of checked servers, and you can know their current settings. The left half is organized in a same way as the Configure Room Server popup, but all the fields except Cluster name appear empty. Specifying values for one or more items on the left and clicking on the Save button applies the specified settings to all the checked servers. Those settings that are left empty are unchanged.
The popup has a Copy settings dropdown on it. If you copy, all the settings will be applied to all those servers.
Changing cluster name
You can also change a cluster name on a Configure Server popup. Just rewrite the cluster name along with other settings and Save them.